Owncloud is great for:
- Saving sensitive data for free.
- Automated saving and syncing of files to all devices
- Set file and user permissions and control who can read, write or view your files.
- Keeping your files on your server privately.
- You need an expandable storage solution.
- Stable Drive Storage
In this article, we will start the process as follows:
- 1 Prepare Computer.
- 2 Create Installation Media.
- 3 Configure Raid.
- 4 Install & Setup Ubuntu Server 20.04 with Raid 1.
- 5 Set up SSH to access the server.
- 6 Install LAMP Server (Linux, Apache, MYSQL, PHP).
- 7 Install Webmin for Reporting and notifications.
- 8 Install Owncloud.
- 9 Create Owncloud Users.
- 10 Install desktop clients.
- 11 Share files and folders with permissions.
1) Prepare Your Computer.
With Linux Server OS being device friendly, we can install it on almost all computers. For most home or business users, this means that you can host your OwnCloud server on your premises.
There are various online cloud solutions like Dropbox and OneDrive that work great. If you have private files or need the extra features, you can look at hosting your Owncloud backup server.
Before we begin to set up our server, there are a few health checks to do.
Replace CMOS battery.
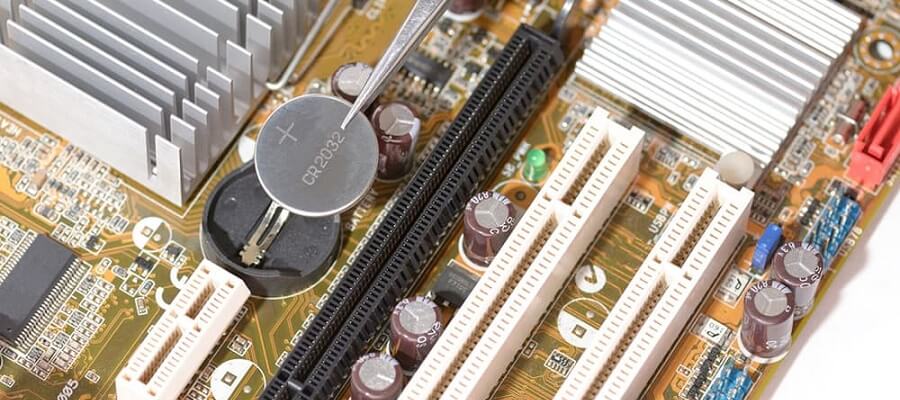
Computers have a small built-in battery to keep the bios settings such as time, boot devices, and other advanced features like Restore on AC Lost. The battery lasts many years, and not using the computer damages the battery. Replacing the battery will avoid startup errors which might cause your newly created server not to boot and asking to enter keyboard commands to continue. A server should boot up without issues.
Most Cloud Servers automatically boot up after power loss, and this is a must. We need to configure our computer to Restore on AC Lost. If the power goes off and back on, it will automatically boot up and load the OS.
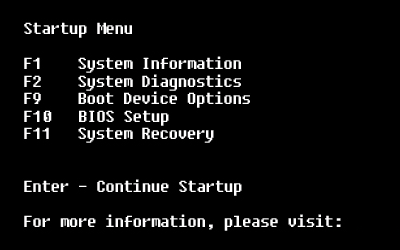
To set this option, enter the computer BIOS, and press the command keys for your device. Each computer manufacturer will have different values, and a simple google will do the trick. For our HP, we press f10 until it loads the bios.
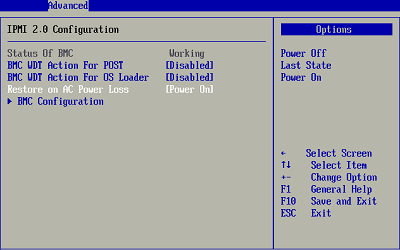
You can use the keyboard to navigate to the advanced tab. Use the down arrows to select Restore on AC Power Loss.
If you have extra memory, you can install them in the memory slots. On these older machines, they still use the old hard drives that are slow. For our build, We added 2 x 120GB SSD drives to set up our test server. If you have a friend that does 3d printing, you can ask them to print 3.5inch to 2.5inch adaptors.

Depending on your device, you might have different adaptors you need. These keep the SSD hard drives nice and tidy. We added 2 Hard drives that we will set up as raid in step 3.
Remember to clean your computer before you begin the installation. From our personal experience, we refurbish our computers the following way:
- Strip the entire machine.
- Wash the motherboard and case with clean water.
- Let it dry naturally, and use air to remove any water in the sockets.
- Remove all dust on covers, fans, and parts.
- Repaint the case (if scratched).
- Add new thermal paste.
- Assemble PC.
Our machine is ready, we can now move to step 2 and create our installation media.
2) Create Installation Media
We need to get a flash drive with at least 8GB of space. We will add the Linux OS to our flash drive and start the installation.
Step1: Download Ubuntu Server 20.04.3 LTS
note: the LTS means you will get security and support Extended until April 2030.
Visit: https://ubuntu.com/download/server and click on option two to download the ISO file.
Step2: Download RUFUS
note: Rufus is a small application used to make the bootable flash drive.
Visit: https://rufus.ie/en/ and click on “Rufus 3.15”
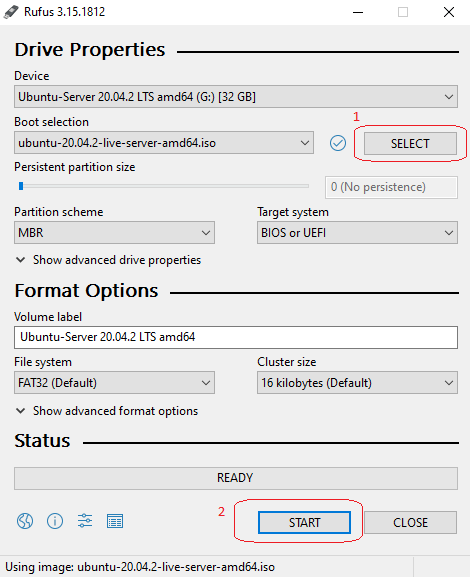
Step 3: Open Rufus and click on select.
- Open Rufus, click on select.
- Select the downloaded ISO image file.
- Click start at the bottom.
- Choose: Write in ISO image mode.
- Click Ok: Warning all data on USB will be lost.
You should see a message the process is complete.
3) Configure Raid 1 (Mirrored)
WHAT IS A RAID?
Raid stands for (Redundant Array of Independent Disks).
When it comes to data, you want to make sure you have more than 1 Hard disk to keep your files safe. Production servers come with hardware Raid controllers built-in.
There are 2 Raid Options.
Option 1: Hardware Raid.
Hardware raid uses computer hardware.
Not all computers have built-in raid controllers, and you can verify this in the bios by searching for RAID.
Option 2: Software Raid.
Software raid is used when you don't have any raid controllers on the motherboard and is a bit more complex to set up. Raid will copy files to all disks at the same time. If you lose a disk, raid will mirror data to the new disk. The mirroring process is automatic, and you can add more than two drives when setting up a raid controller.
In step 7, We are going to set up email alerts to monitor the raid drives.
4) Install & Setup Ubuntu Server With Raid 1.
Insert the Flash drive in the rear USB port and power on the computer. We will walk you through the installation step by step in the steps slider below.
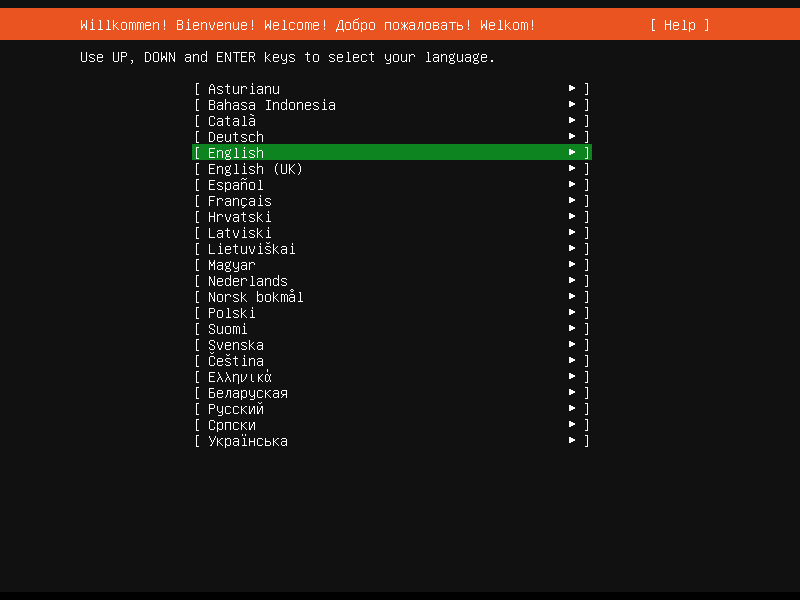
Select your language and press enter. The language can also be changed after installation.
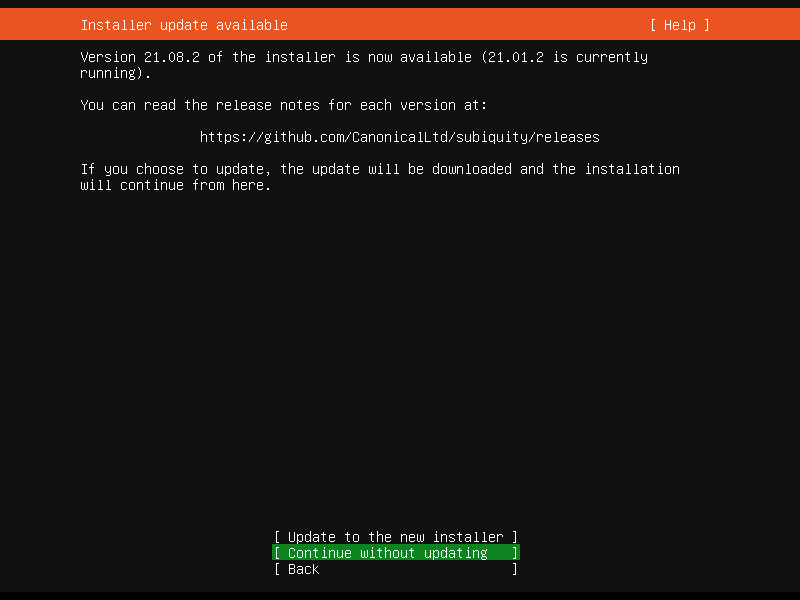
Select "Continue without updating". You can update the system after installation.
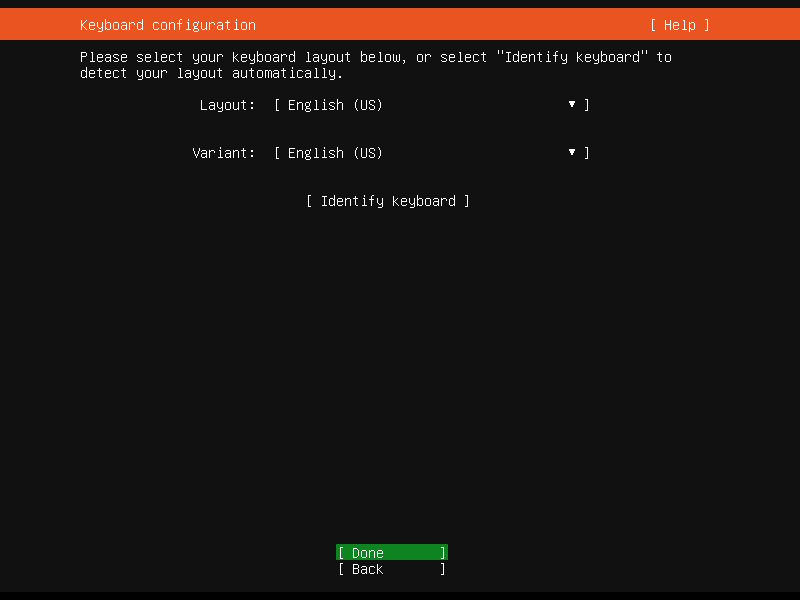
In my country, we select English (us) as our default keyboard. This can be changed after installation.
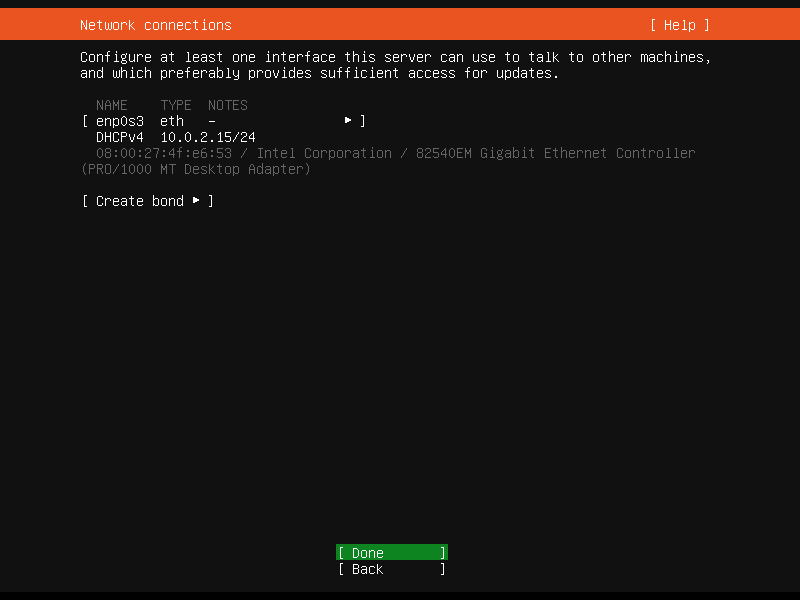
You can keep it on DHCP for now. We will set a static IP address after installation.
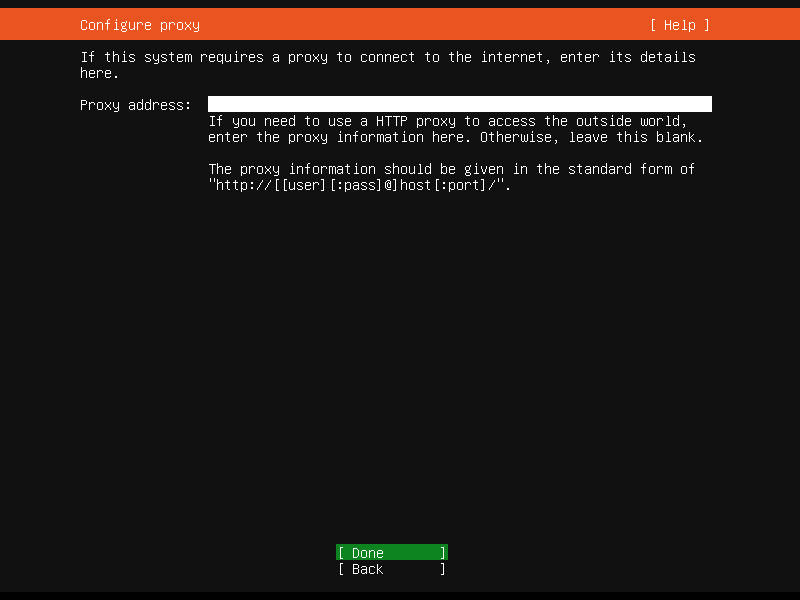
For this tutorial, we will not be using any proxy servers.
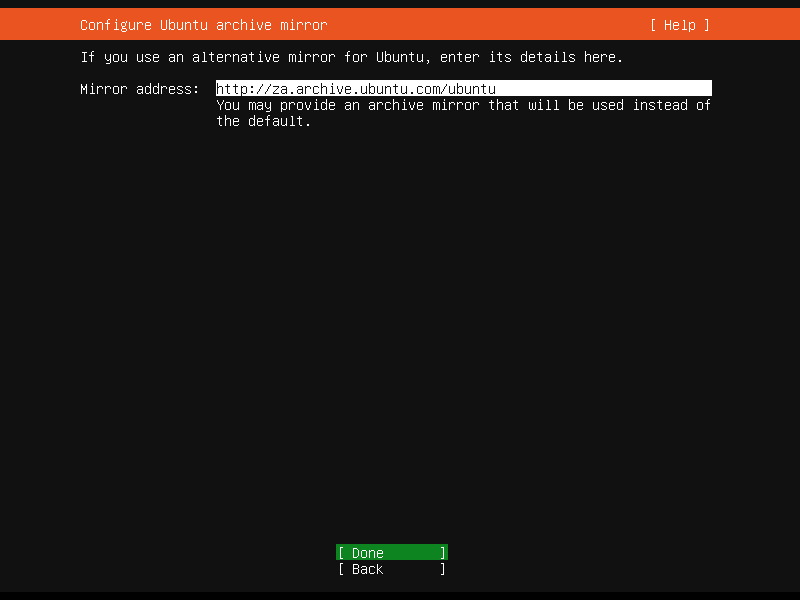
Linux will automatically pick the best mirror site to download packages.
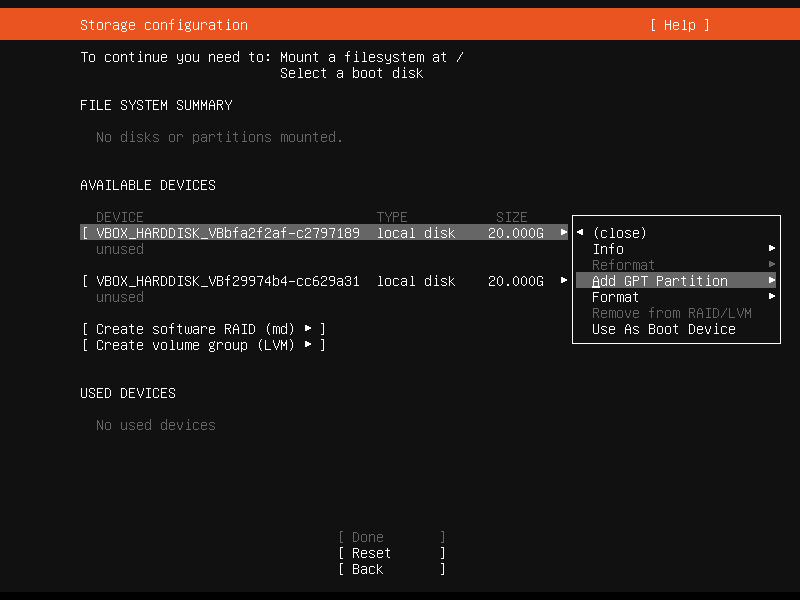
Use the down key on the keyboard and press the spacebar on the custom storage layout. For raid 1 to work, you need at least 2 hard disk drives.

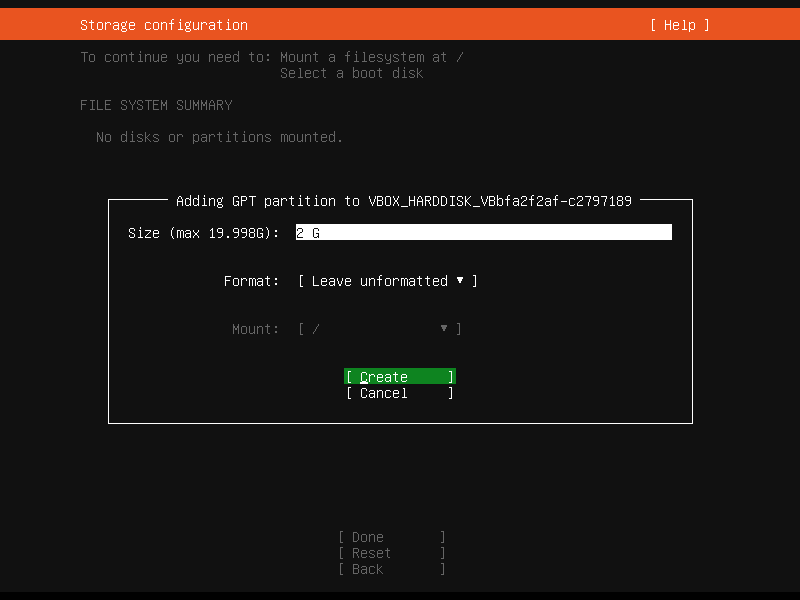
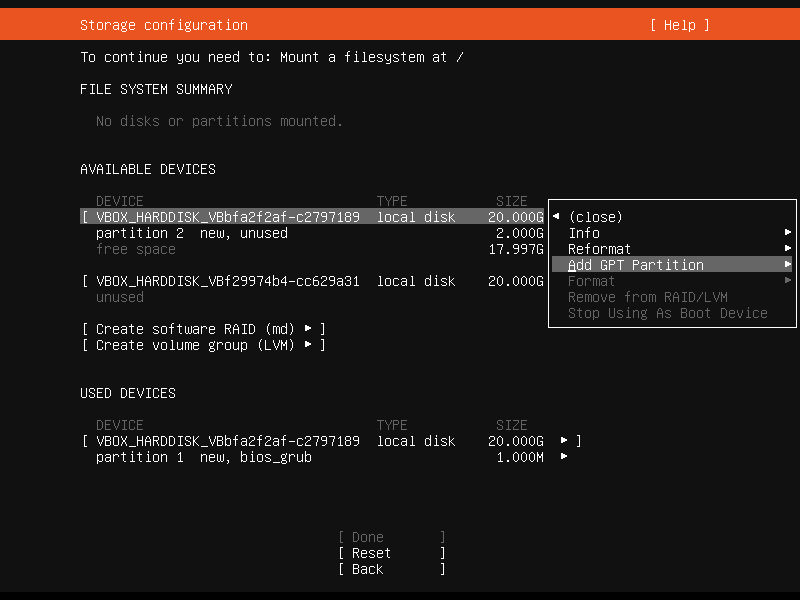
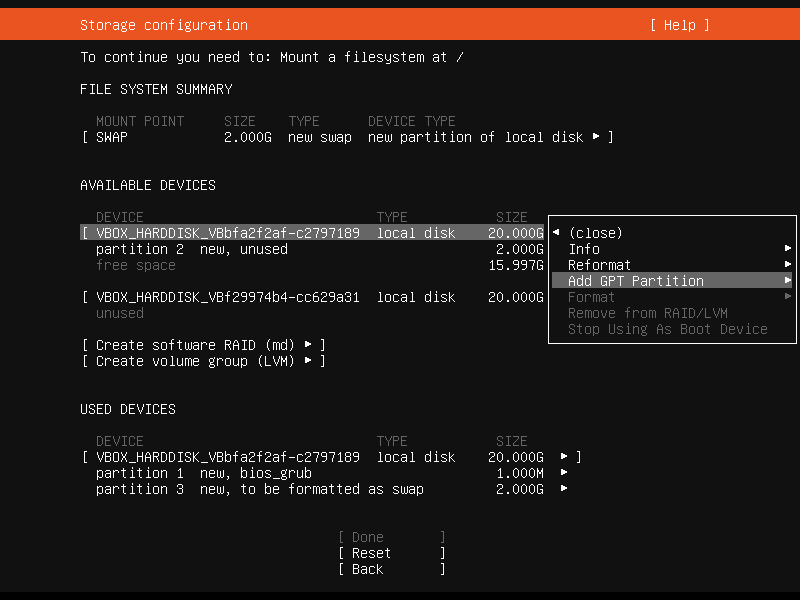
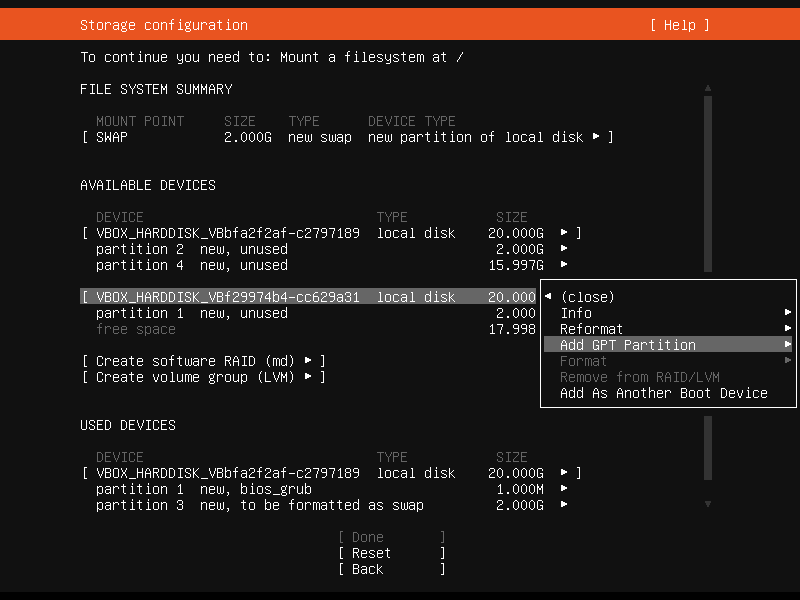
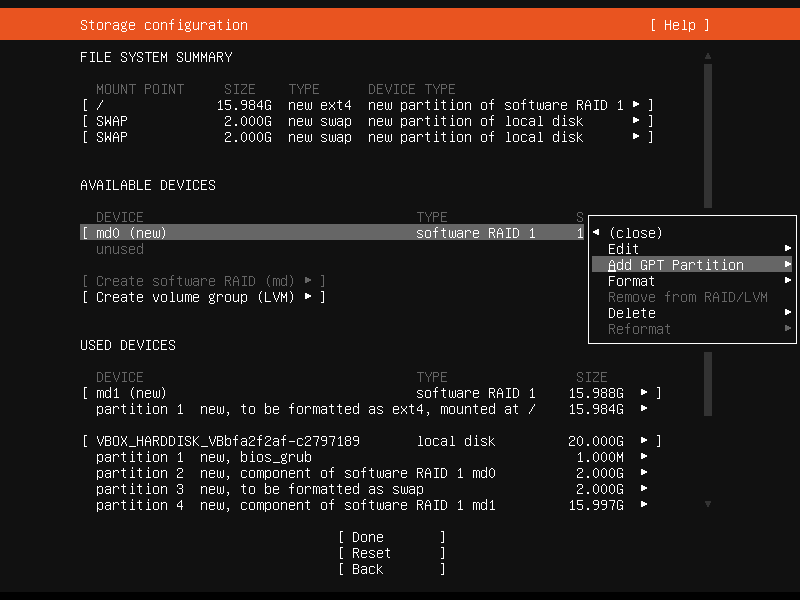
Select the first drive and press enter, on the next menu choose "Add GPT Partition" and press enter.
We need to create the first partition. This will be used for boot. A good value is 2 GB. On the field, press the enter key and type 2 G, press enter, use the down arrow, and select format. Press enter, select "leave unformatted" and select create.
Select the first drive and press enter, on the next menu choose "Add GPT Partition" and press enter.
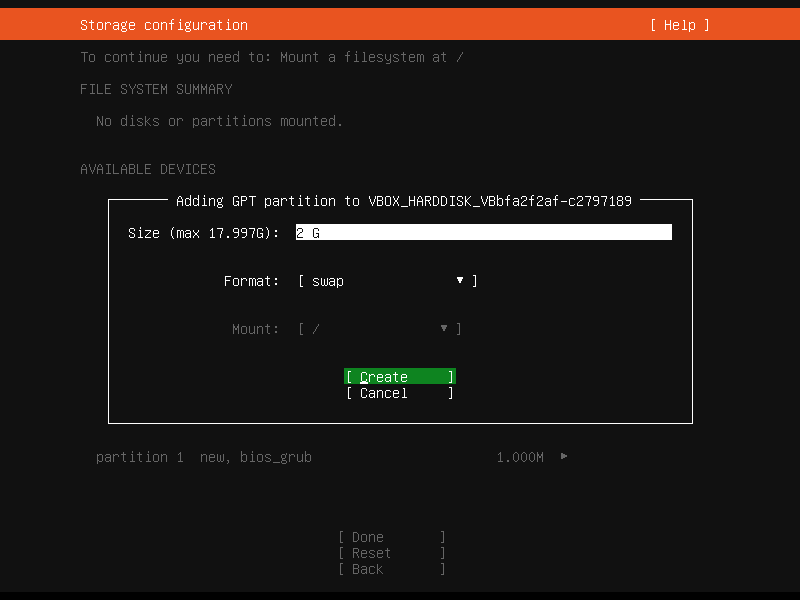
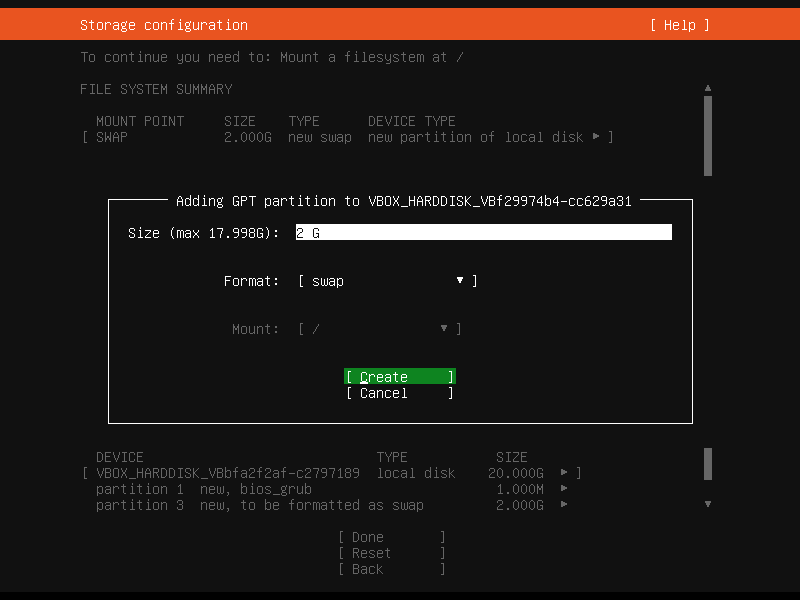
You need to create the second partition. This will be used for swap.
- The swap size should be 2x your total system memory.
- We are using 1 GB of ram and selected 2 G as the total swap size.
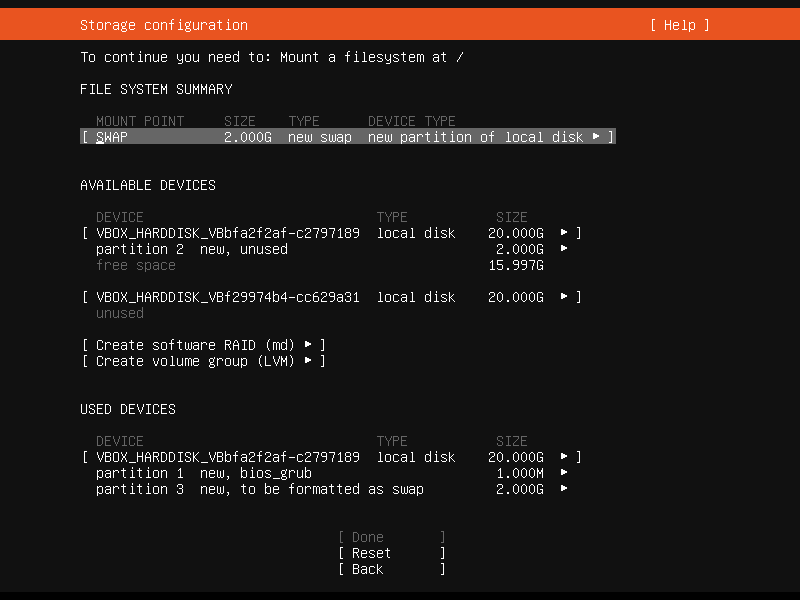
You will see the swap partition is created | Drive 1
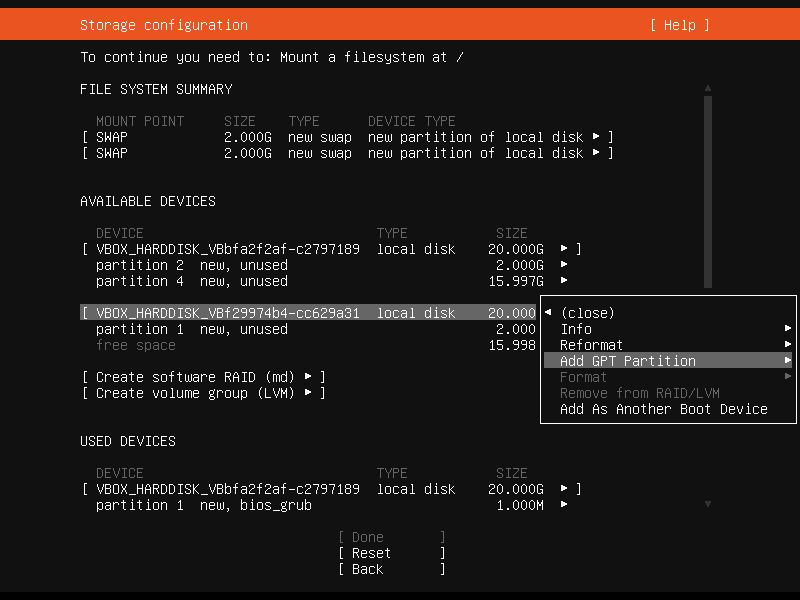
Select the first drive and press enter, on the next menu choose "Add GPT Partition" and press enter.
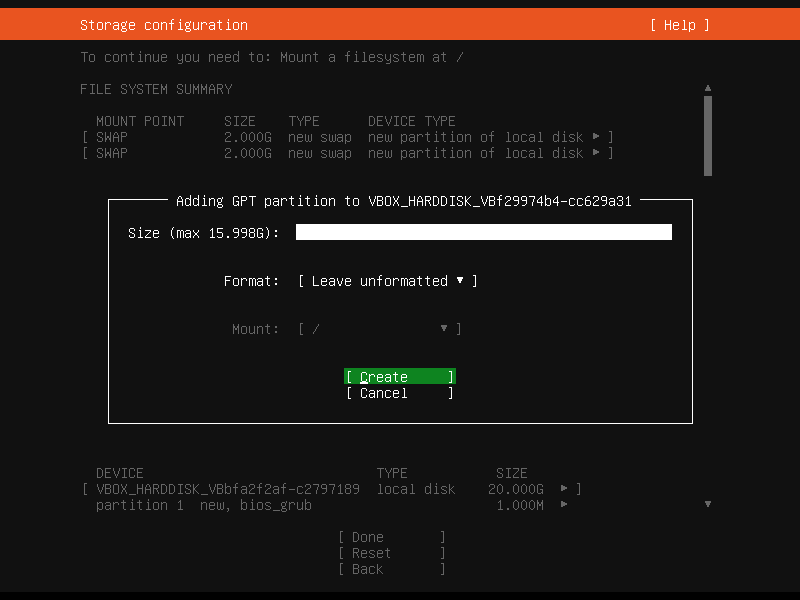
We need to create the main partition. This will be used for the system. Press enter on the text field to select the total leftover space, select "Leave Unformatted" for format. Click on create.

You will see there are 3 partitions under hard drive 1. We can now repeat this step for hard drive 2. You can add more drives and repeat the steps.
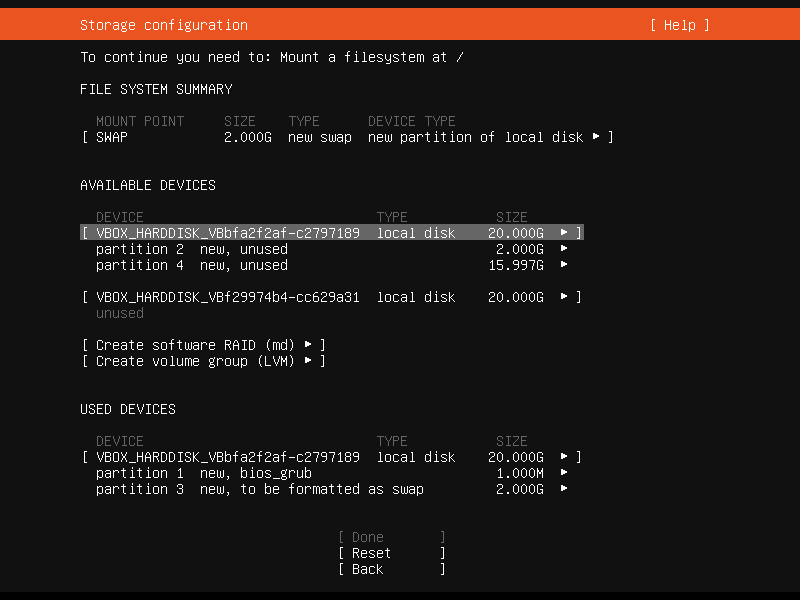
Select the second drive and press enter, on the next menu choose "Add GPT Partition" and press enter.
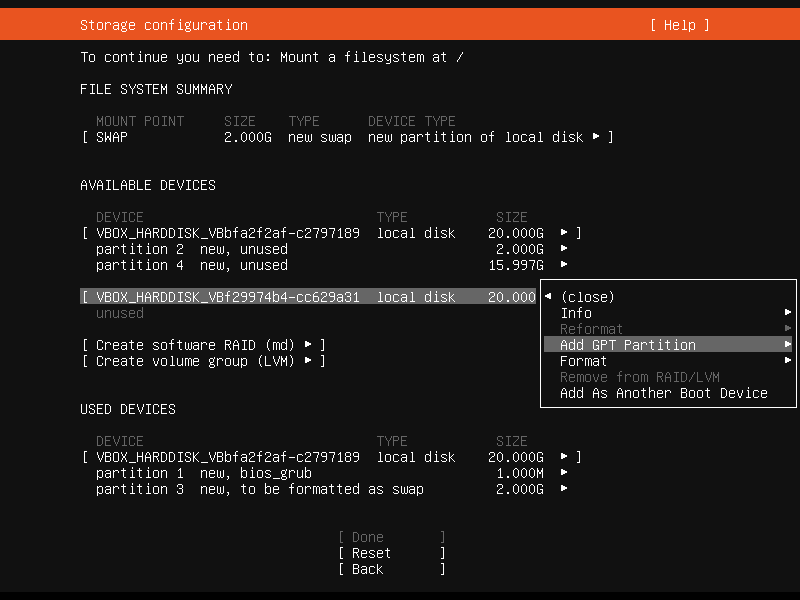
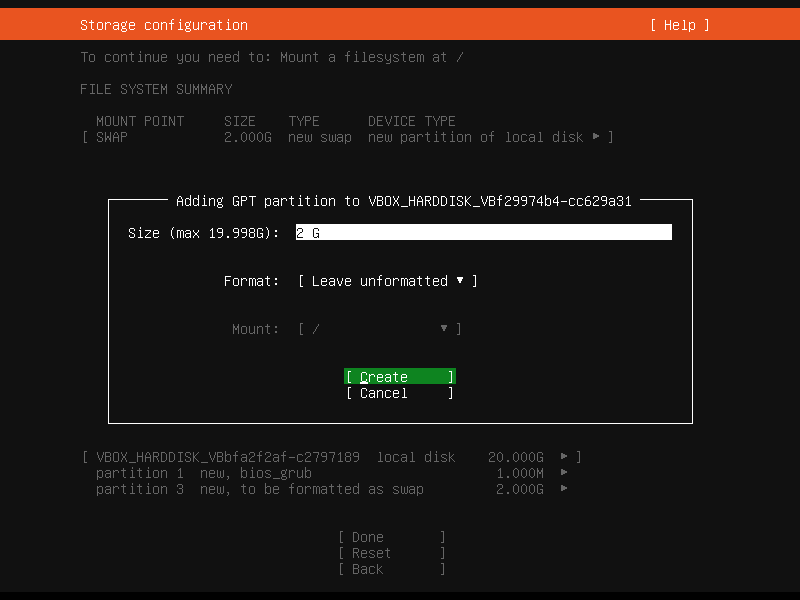
We need to create the second partition. This will be used for boot. A good value is 2 GB. On the field, press the enter key and type 2 G, press enter, use the down arrow, and select format. Press enter, select "leave unformatted" and select create.
Select the second drive and press enter, on the next menu choose "Add GPT Partition" and press enter.
We need to create the second partition and format it as a swap. This partition will be used as a swap.
- The swap size should be 2x your total system memory.
- We are using 1 GB of Ram and selected 2 G as the total swap size.
You will see the swap partition is created.

Select the second drive and press enter, on the next menu choose "Add GPT Partition" and press enter.
We need to create the main partition. This will be used for the system. Press enter on the text field to select the total leftover space, select "Leave Unformatted" for format. Click on create.
You will see there are 3 partitions under hard drive 2. You can format additional drives if you have attached more than 2 drives.
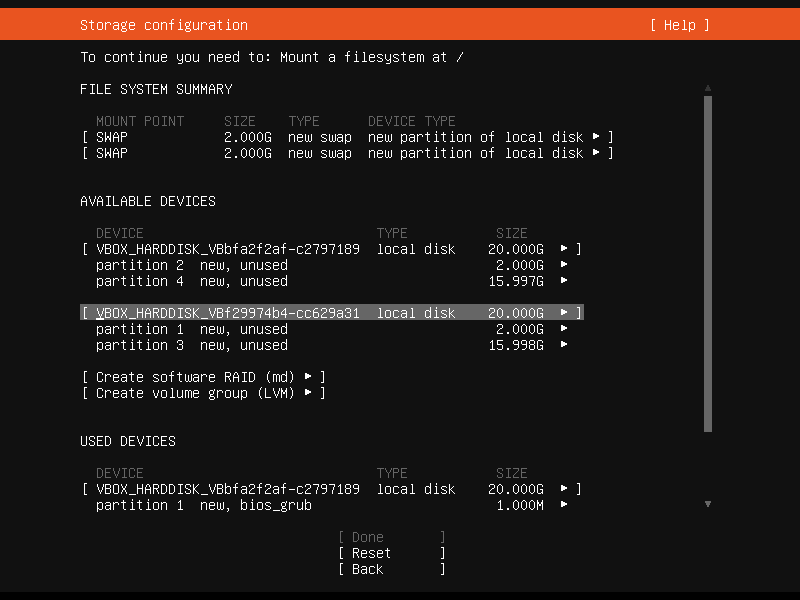
Scroll down to software raid (MD) and press enter.
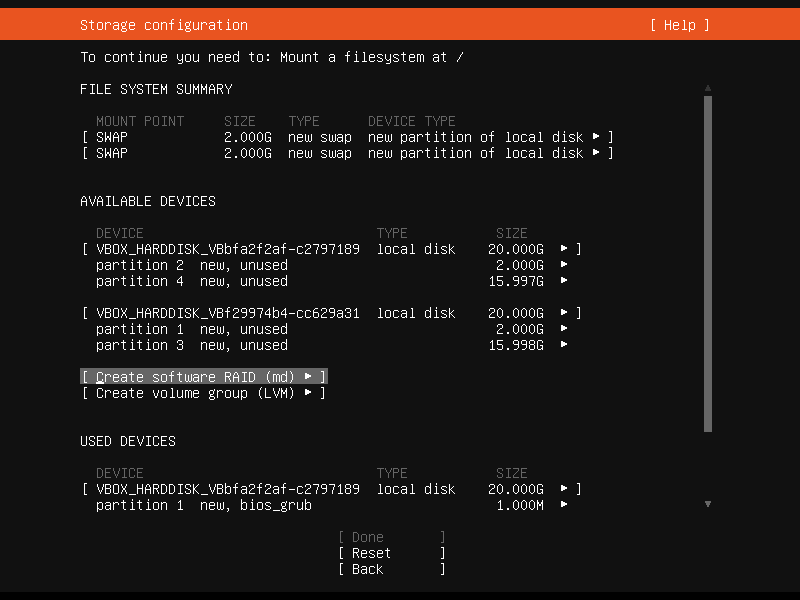
Scroll and press the spacebar in the bracket next to partition to select the smallest partitions, then scroll to "create" and press enter.

You will now see the md0 (New) raid controller is created for partition 1.
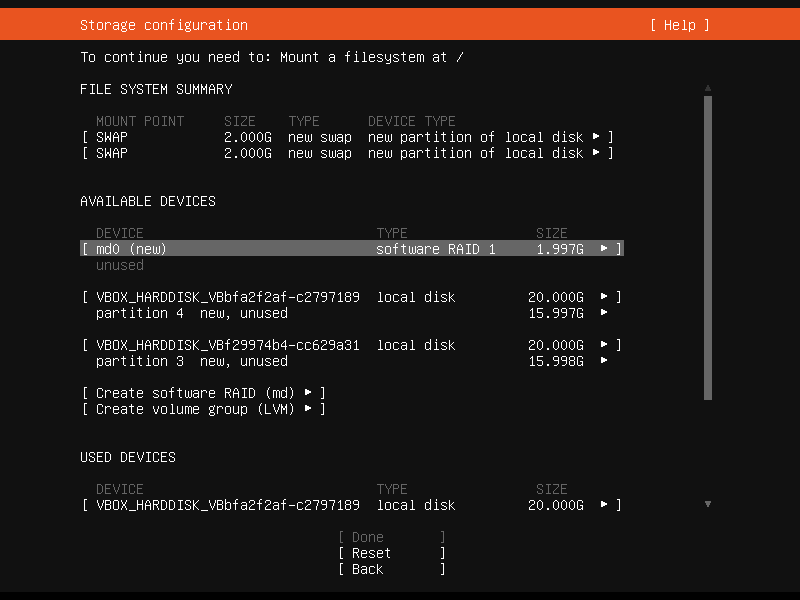
Scroll down to software raid (MD) and press enter.
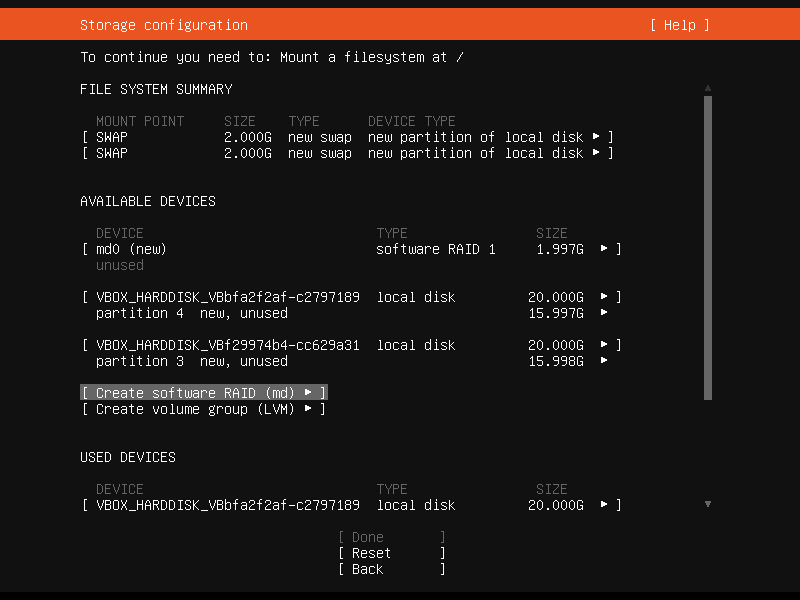
Scroll and press the spacebar in the bracket next to partition to select the remaining partitions (2), then scroll to "create" and press enter.
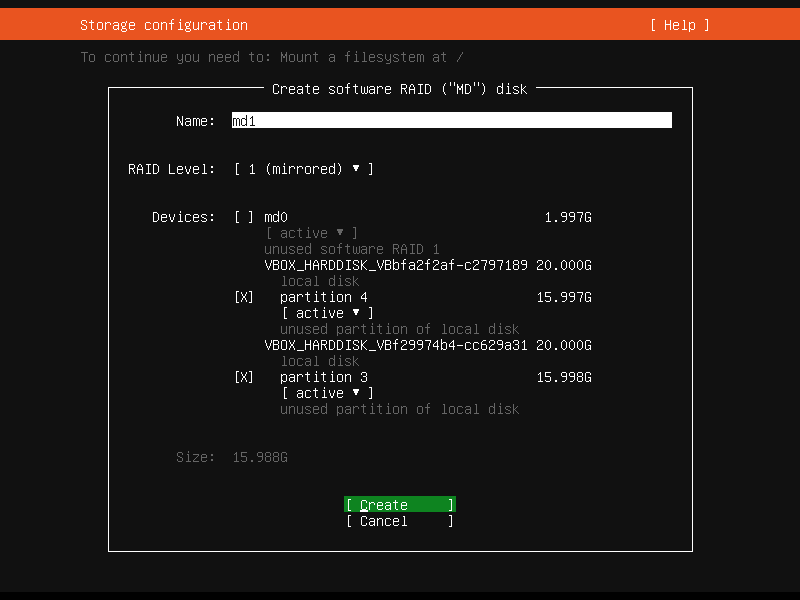
You will now see the md1 (New) raid controller is created for partition 2.
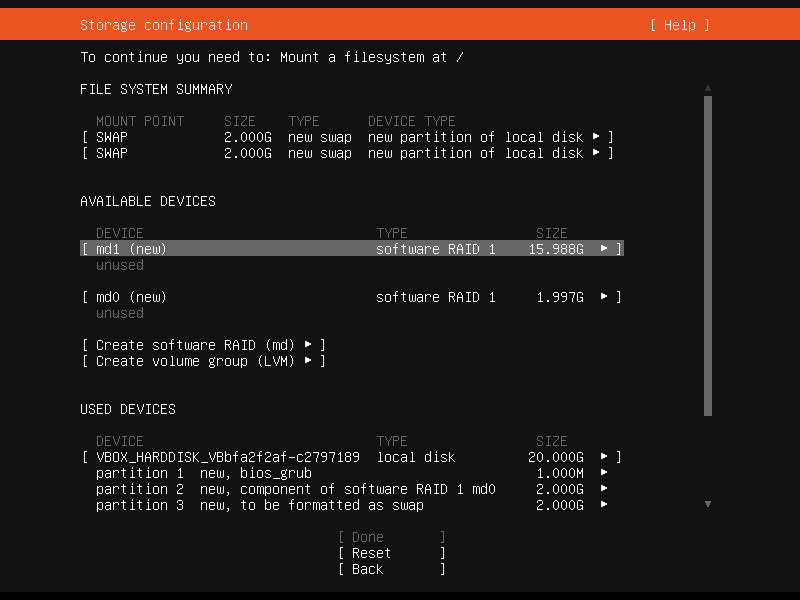
Select md1 (new), and choose "Add GPT Partition", then press enter.

Linux will automatically determine the settings, if not select under format: ext4, and mount "/", then scroll down to create.
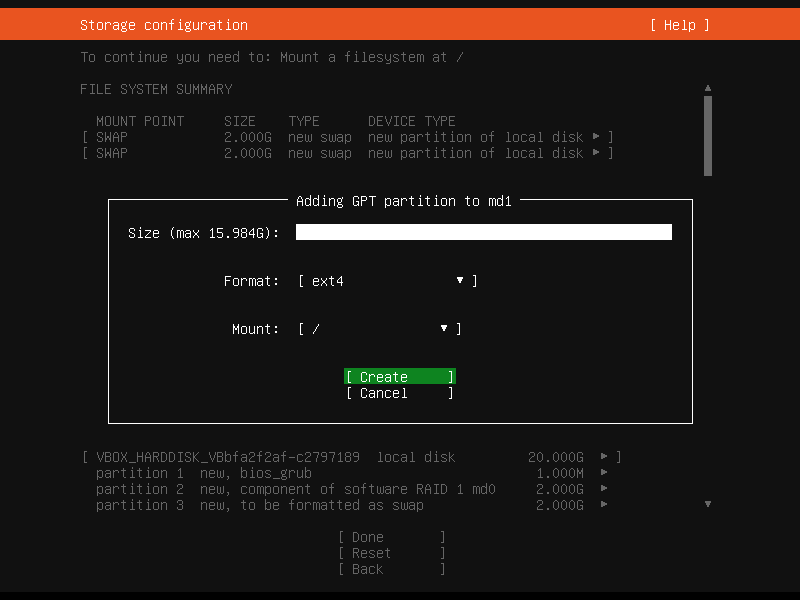
Under "Files System Summary" the mount point will be set for "/"
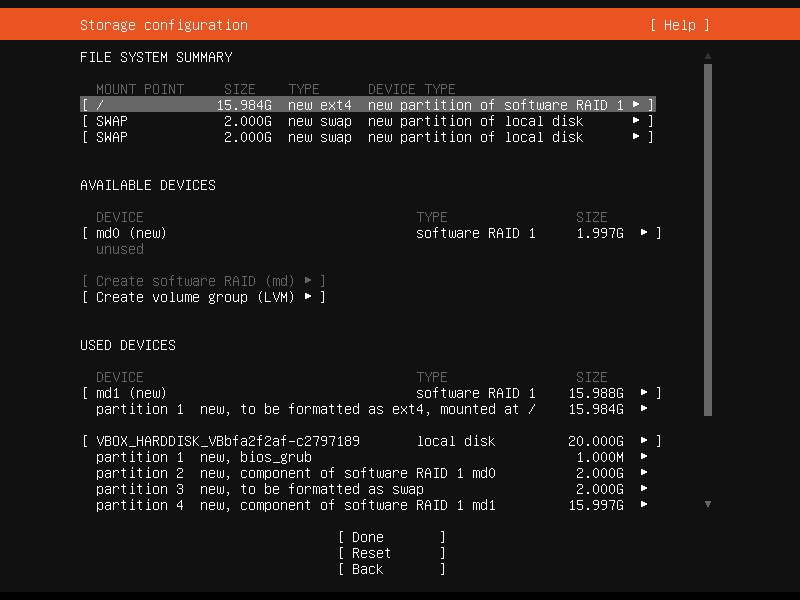
Select md0 (new), and choose "Add GPT Partition", then press enter.
Linux will automatically determine the settings, if not select under format: ext4, and mount "/boot", then scroll down to create.
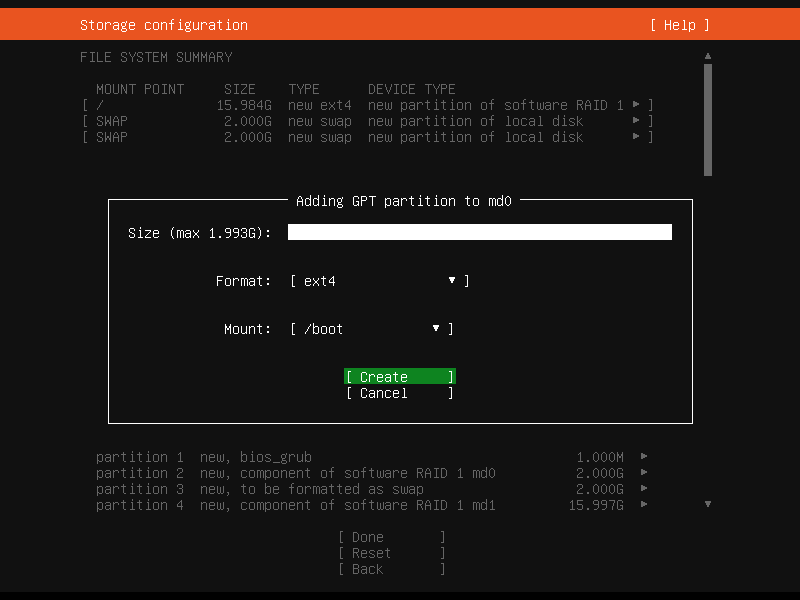
Under "Files System Summary" the mount point will be set for "/boot"
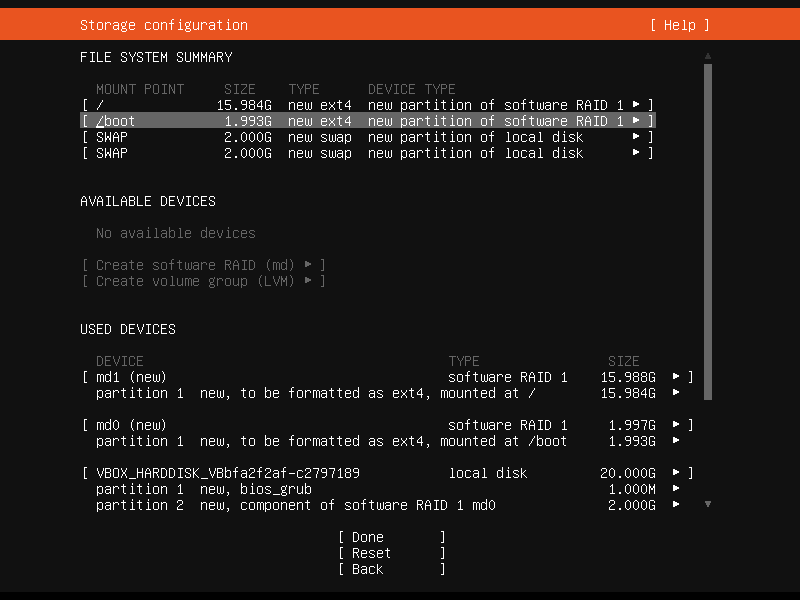
We can now click on "done".
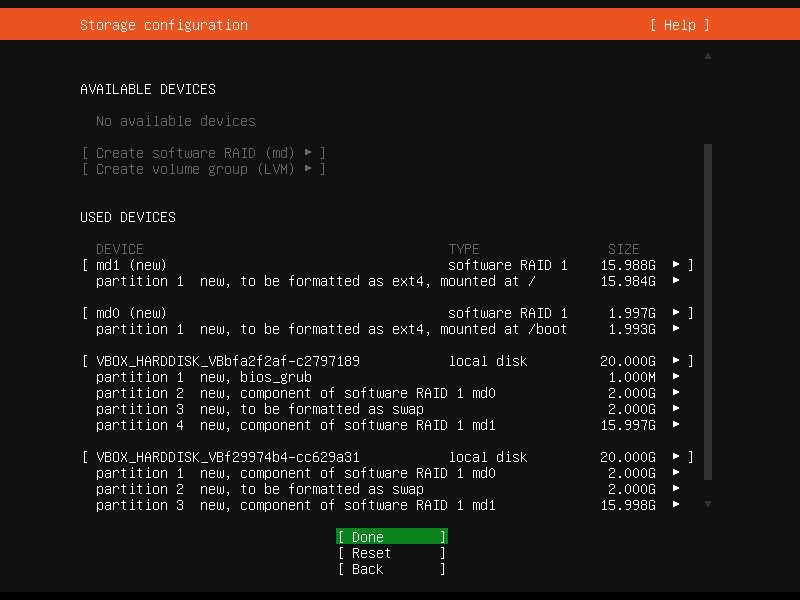
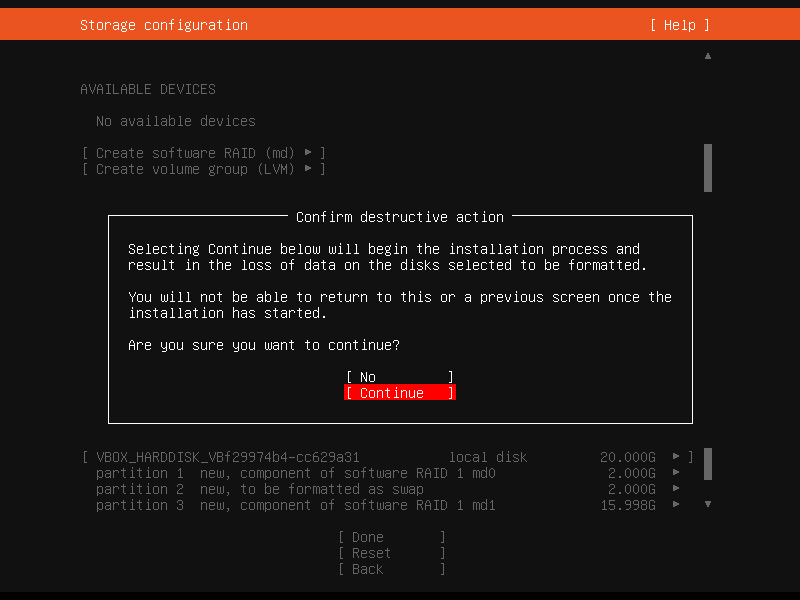
Confirm that all your settings are correct, we can now select "Continue" and press enter.
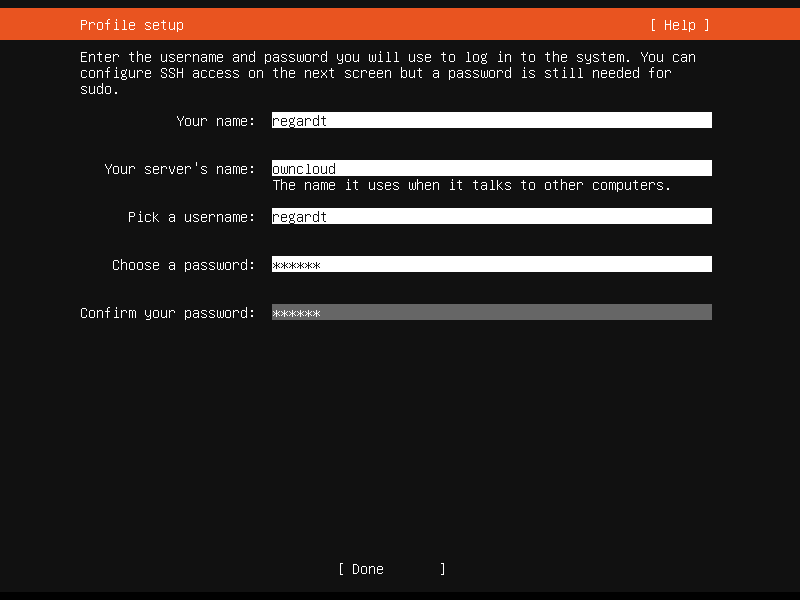
Enter your username and password. Under "your server name" add any name you want. Something simple and short is always better. Click on done to continue.
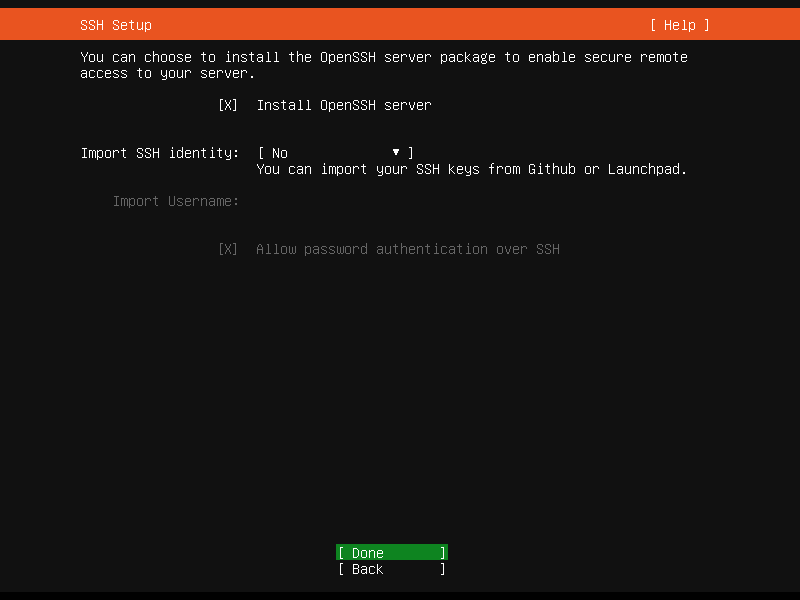
Scroll to "Install OpenSSH Server", then press the spacebar to select. Scroll down to "Done" and press enter.
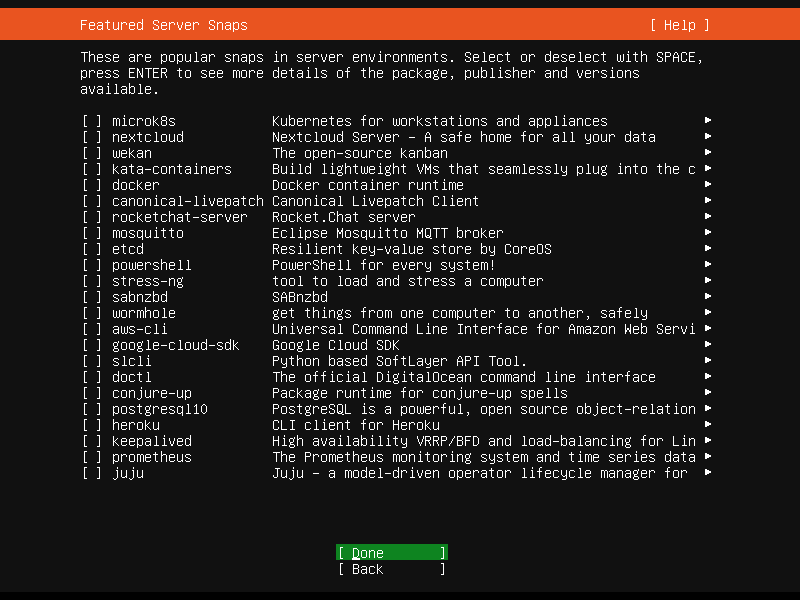
You can leave any other software. Scroll down to "Done" and press enter.
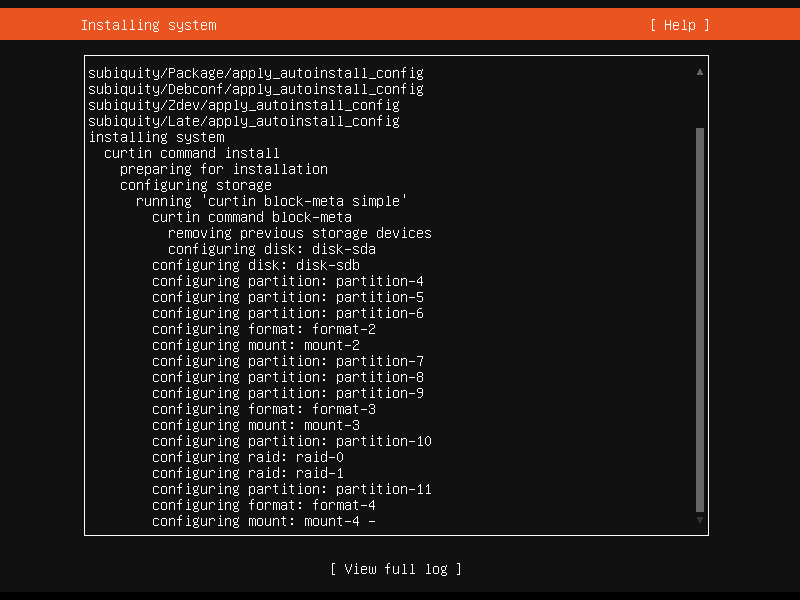
We need to wait 10 - 40 minutes for Linux to install depending on your hardware.
The installation was successful. You can cancel the updates, however, we normally wait until updates are done, then reboot the server.
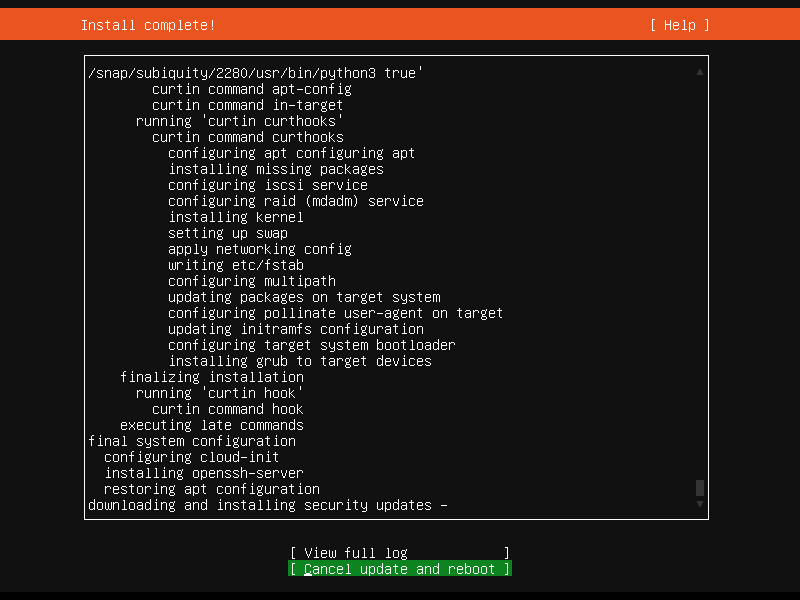
With the installation finished, remove the flash drive and reboot the computer.
5) Set up SSH to access the server remotely.
Accessing your server from other devices on your network is good. You can only have a network (CAT6) cable with a power cord plugged in. For this tutorial, we need to download some software to log in to our server.
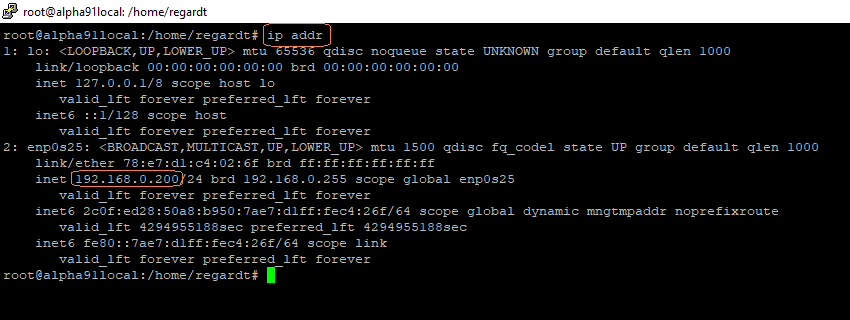
Step1: Get the IP address of the server.
After installing the server software, we can sign in to the server to get the server IP address.
If you see a login screen with other info, you can press enter on your keyboard to enable the login option. Type your username, press enter, then type your password.

You can now type ip addr to get the server IP address. You can also view the IP on your router or with an application called "Angry IP Scanner". We will set a static in the next steps that will keep our server on the set address.
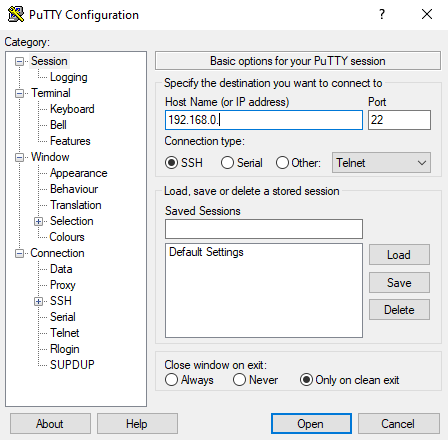
Step1: Download Putty (Old school).
Putty is u super lightweight SSH client to log in to servers and devices. You can use any SSH client, however, we are using putty for this setup.
Download putty: Here
Awesome, you can now sign in with your username and password.
Switch to root access.
With root access, you can install most software without typing any sudo or passwords. We can continue to install our LAMP Server in the next step.
6) Install LAMP Server (Linux, Apache, MYSQL, PHP).
Linux offers very secure and stable web servers. With so many options to choose from, most users install apache or Nginx as their web server.
Why LAMP Server?
Owncloud will be running on PHP with Mysql which is now moved over as MariaDB with more security and performance improvements. Apache can be configured to allow only specific IP addresses to connect, and by using it with the build-in Unix Firewall (UFW), you can control your traffic.
Step 1: Open Putty and connect to the Server.
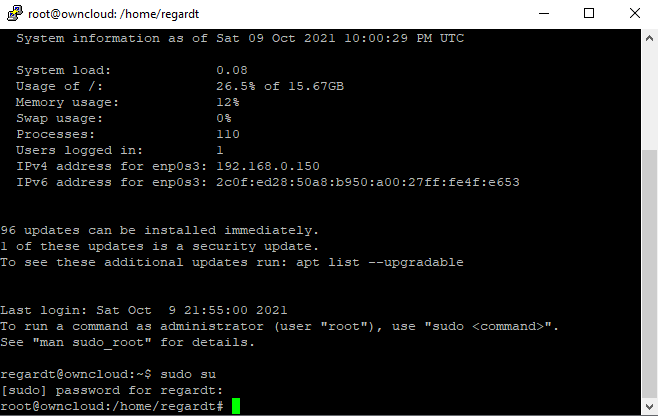
Open putty and connect to the server IP Address. Remember to switch to root by typing "sudo su" and pressing enter.
ℹ Hint: Whenever you copy the code, you need to paste in putty by "right-clicking". then you can press enter. If there are any spaces after the copy text, putty will submit automatically.
When you copy "sudo su " instead of "sudo su", it will auto-submit, but if it does not, simply press enter.
Step 2: Update Software Packages
Before we begin we need to do a system update, then upgrade to make sure we are running the latest security patches.
Copy the commands below 1 line at a time. Right-click in putty to paste the command, or type the command if you have patience.
sudo apt update
sudo apt upgrade
ℹ Hint: You can type "clear" to clear the screen, this will make life easier.
clear
Step 3: Install Apache Web Server
Apache Web Server will be installed and the folder path is located under /var/www/html. You can harden your apache security and set various options, however in this tutorial, we will only cover intranet (internal) usage.
Install Apache with this command.
sudo apt install -y apache2 apache2-utils
clear
Apache will automatically start up when you reboot your server, but you can manually start and stop the Apache server with these commands.
service apache2 stop
service apache2 start
systemctl status apache2
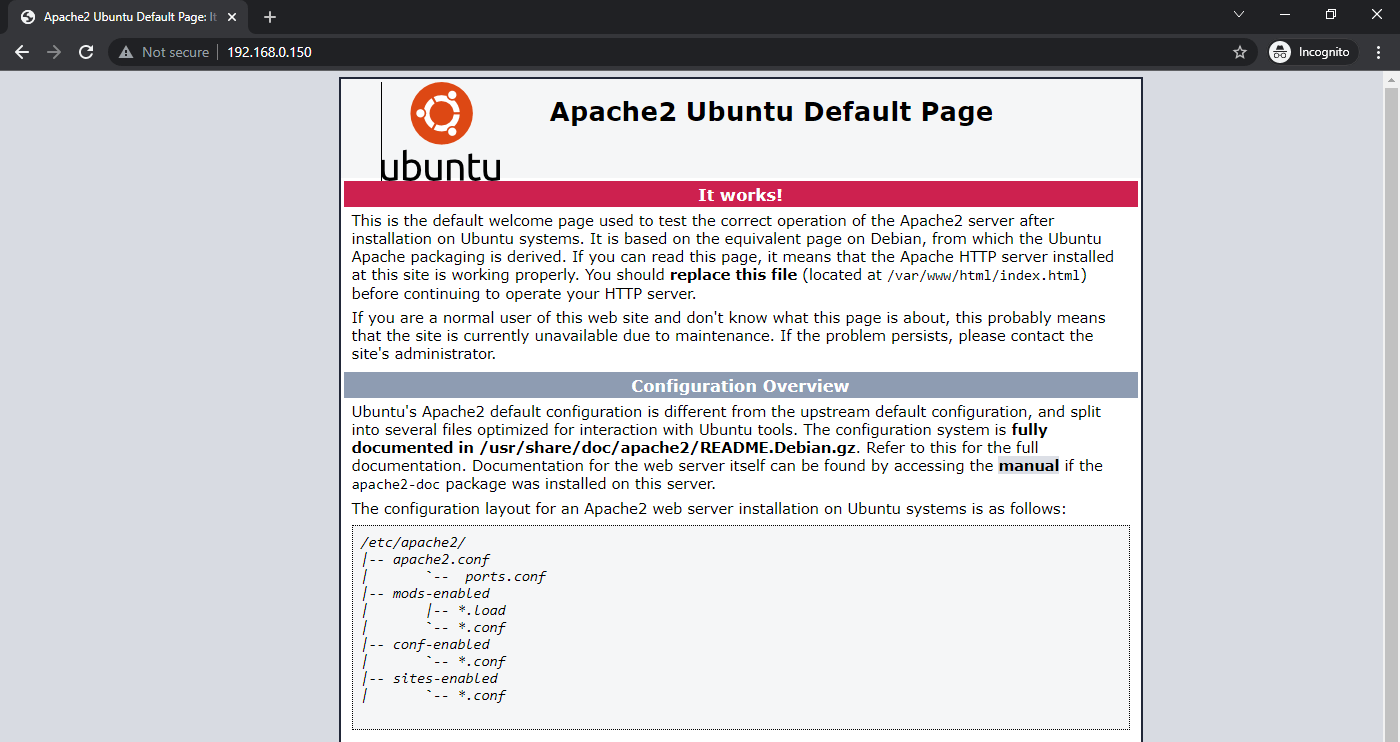
Apache is running and we can now access the server in our browser.
Open your browser and type: http://youripaddress.
You will see the default page for apache. This will be replaced with the OwnCloud Login page in the following steps.
Step 4: Install MariaDB Database Server
OwnCloud uses a database to keep track of all your files. To install MariaDB, type the following commands.
sudo apt install mariadb-server mariadb-client and type "y" and enter to confirm
systemctl status mariadb
clear
Let's secure MariaDB with the following commands.
sudo mysql_secure_installation
When it asks you to enter the MariaDB password press enter key as the root password and type "y" to set a root password for the MariaDB server.
ℹ Hint: When you type passwords and sensitive information, Linux will not display any keystroke asterisks on the screen, but just type your info in this invincible way.
- Change the root password? [Y/n] - type Y and Enter.
- New password: - type your password.
- Re-enter password - retype the password.
- Remove anonymous users? - type Y and enter.
- Disallow root login remotely? - Type Y and enter.
- Remove test database and access to it? - Type Y and enter.
- Reload privilege tables now? - Type Y and enter.
- Type "Clear" to reset the screen.
Now make a new text file or Excel document to save your passwords and settings.
We now have MariaDB installed, we can now proceed to install PHP that is required by our OwnCloud Server. MariaDB Server will start up automatically every time you reboot the server.
Step 5: Install PHP
PHP (Hypertext Preprocessor) is a widely-used open-source scripting language that is suited for web development and can be embedded into HTML. The OwnCloud server is designed in PHP and will be served on the Apache webserver.
Type the following commands to install the latest PHP version.
sudo apt install php7.4 libapache2-mod-php7.4 php7.4-mysql php-common
Type "Y" to confirm and press enter to install. To verify php version type the command below.
php --version
You will see the version below. This means PHP is installed.
7) Install Webmin for Reporting and notifications.
Webmin is super simple to install, it allows you to manage your server through your favorite browser. You can run scripts, commands, and a huge array of functions, plugins in a more visual way. Webmin gives you access to many things you’d normally need to access through the console.
We install Webmin for reporting, alerts and will be using Webmin to monitor our system health, as well as our hard drive status. You can set up an email account to send you email notifications if any hard drives have errors or need attention.
ℹ Hint: Nano is a text editor for Linux. The commands can be confusing in the beginning. When you run nano, the text editor will open to change data.
Keep this in mind.
- Use the keyboard arrows to move up and down.
- Right-click to paste.
- Ctrl O will ask to save the document. Press enter to save.
- Ctrl X closes the editor.
Type this command to open the sources list
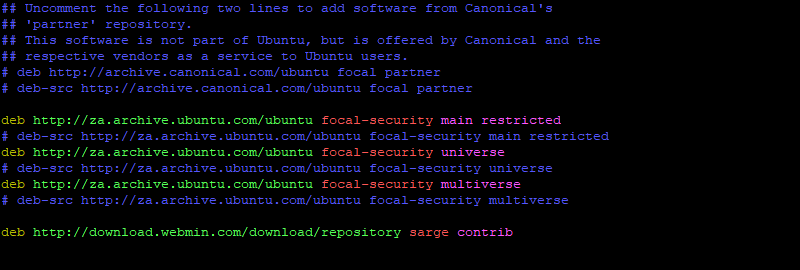
sudo nano /etc/apt/sources.list
You will now see the file opened in the nano editor.
Copy this code: deb http://download.webmin.com/download/repository sarge contrib and paste it at the bottom using right-click
Press CTRL O to save, then press enter to accept.
Press CTR X to close the window.
Next, We download the Webmin PGP key with wget and add it to our system’s list of keys.
clear
wget -q -O- http://www.webmin.com/jcameron-key.asc | sudo apt-key add
You will get feedback saying "OK". We now run a system update to fetch the new Webmin Packages.
sudo apt update
When the update is done, we will now install the Webmin packages with the install command.
sudo apt install webmin
Do you want to continue? - Type Y and enter.
Wait until Webmin is finished installing.

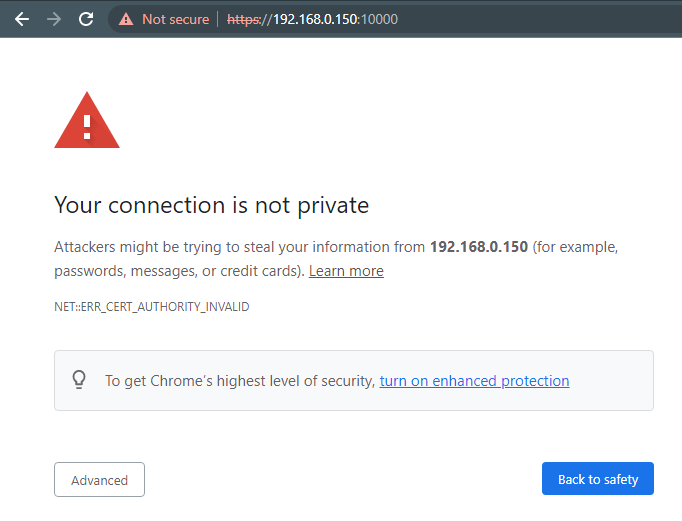
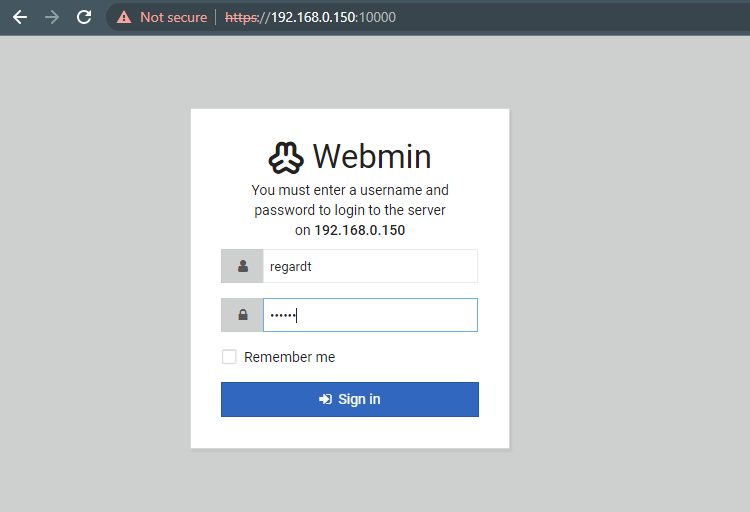
If the installation is completed, you can visit https://yourserverip:10000 Remember to paste or type the full link before you open the webpage. You will get an SSL warning and this only means that you do not have an SSL certificate installed. Don't worry, click on advanced, then click "proceed anyway"
Sign in to your Webmin server. The username and password is the default system login details used when we set up the server.
Webmin offers various system settings, reports, and notifications. Assuming you wanted to check the status of your hard drives, you can visit Hardware, Then Linux Raid. You can see the health status of the drives.

8) Install Owncloud Auto Sync Server.
Owncloud is a free open source data backup, sync, and sharing platform you can host on your server. OwnCloud offers a solution to individuals or organizations that need to share confidential data internally and externally. The open platform offers better productivity and security within the digital collaboration and enables users to access data no matter where it is stored or which device is being used.
Install the required PHP modules with this command.
sudo apt-get install php-opcache php-gd php-curl
sudo apt-get install php-mysqlnd php-intl
sudo apt-get install php-json php-ldap php-mbstring php-mysqlnd php-xml php-zip -y
Step1: Set up Owncloud Database
We need to sign in to MariaDB and create a new Database for Owncloud. You can type the following commands to get started.
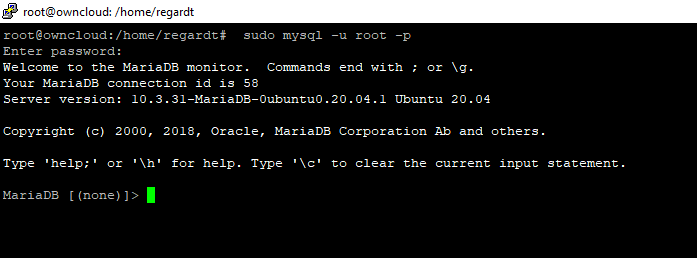
sudo mysql -u root -p
If it asks for a password, you can press enter or type the MariaDB password you created here.
You should be logged in to MariaDB as seen below.
Run this command to create the database called owncloud. Remember to save all your passwords and settings in your text/excel file. You can right-click to paste command.
CREATE DATABASE owncloud;
Create a new user for the Owncloud Connection. This user will only be used to communicate from Owncloud to MariaDB.
We will add a user called owncloud with password qwertyness@@. You can change this value to your preference. Copy code and right-click to paste in MariaDB console.
GRANT ALL ON owncloud.* TO 'owncloud'@'localhost' IDENTIFIED BY 'qwertyness@@';
FLUSH PRIVILEGES;
exit
You have created a Mysql user for owncloud. Now we can continue to install Owncloud Server. Once it is installed, we will configure our users and other settings.
Cadet. We have a few more steps to complete, and the celebration is drawing near.
Step 2: Download ownCloud
We will now download Owncloud PHP files. These files will be served on the apache server we set up in previous steps. To download files you can use a function called "Wget".
The version might be different when you do this step. Just head over to OwnCloud and view the version number under downloads here. Hover on the "Download.ZIP" button to see the version.
Copy the code below and right-click paste in the terminal.
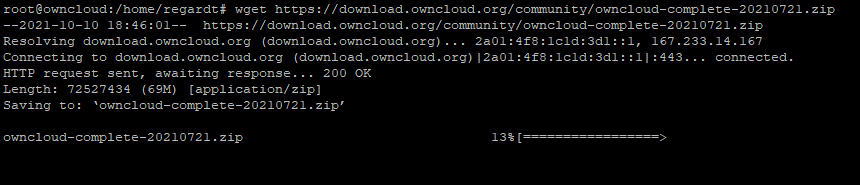
wget https://download.owncloud.org/community/owncloud-complete-20210721.zip
You should see the Wget function download the zip folder containing the files.
To unzip the downloaded folder or any other files, we need to install the Unzip utility. Run the following command to install.
sudo apt-get install zip -y
clear
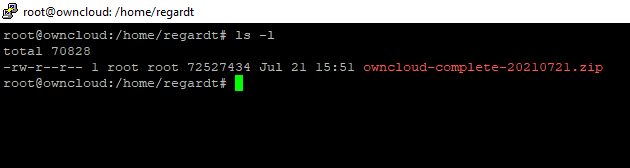
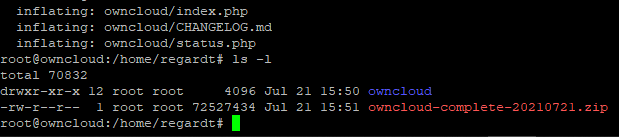
To list all files in a folder we use the command below.
ls -l
You should see the zip folder you downloaded with Wget.
Unzip the downloaded file with the unzip command:
ℹ Hint: You can use the Tab button on your keyboard to auto-complete sentences. Example below.
Type: unzip ow, then press tab. You should see it autocomplete the rest of the filename. Learning to use the tab key will decrease mistakes as well as speed up configurations. If you have 2 files starting with the same name, but ending differently, you can press the tab key multiple times to switch between the file names.
Replace owncloud-complete-20210721.zip with your file name.
unzip owncloud-complete-20210721.zip
When the unzip completes, you will see there is now a folder called "owncloud".
We need to move the owncloud folder to Apache's public web directory. You can use the move command below.
sudo mv owncloud /var/www/html/
clear
We have moved the folder to another location. We need to go to the /var/www/html folder to change a config file.
ℹ Hint: You can quickly go to different directories with the cd (Change Directory) command.
Type the command below to change to another directory.
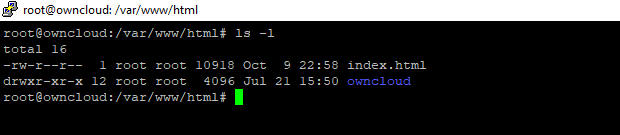
cd /var/www/html/ and press enter.
clear
ls -l will list the files and folders.
You will see the default apache landing page called index.html. We can delete the page with the RM (remove) Command.
rm index.html
When you type ls -l you will see the owners of the files. We need to switch from the root user to the default Apache user called www-data. Run the command to change ownership.
sudo chown -R www-data: /var/www/html/owncloud
By adding the -R we specify that it should apply changes to all files and folders. The Chown command is in terms called the "Change Ownership Command".
We need to reboot the Apache server to enable the modules we installed in the previous step.
service apache2 restart
Make the Owncloud folder writable with the command below.
sudo chown www-data:www-data -R /var/www/html/owncloud/
sudo chmod -R 755 /var/www/html/owncloud/
Great, We can now set up Owncloud in the browser.
Using your favorite browser, enter the server IP address: http://yourserverip
You will notice that there is a folder called Owncloud. This is the folder we moved to the public folder.
Click on "Owncloud" and you should see the setup screen appear.
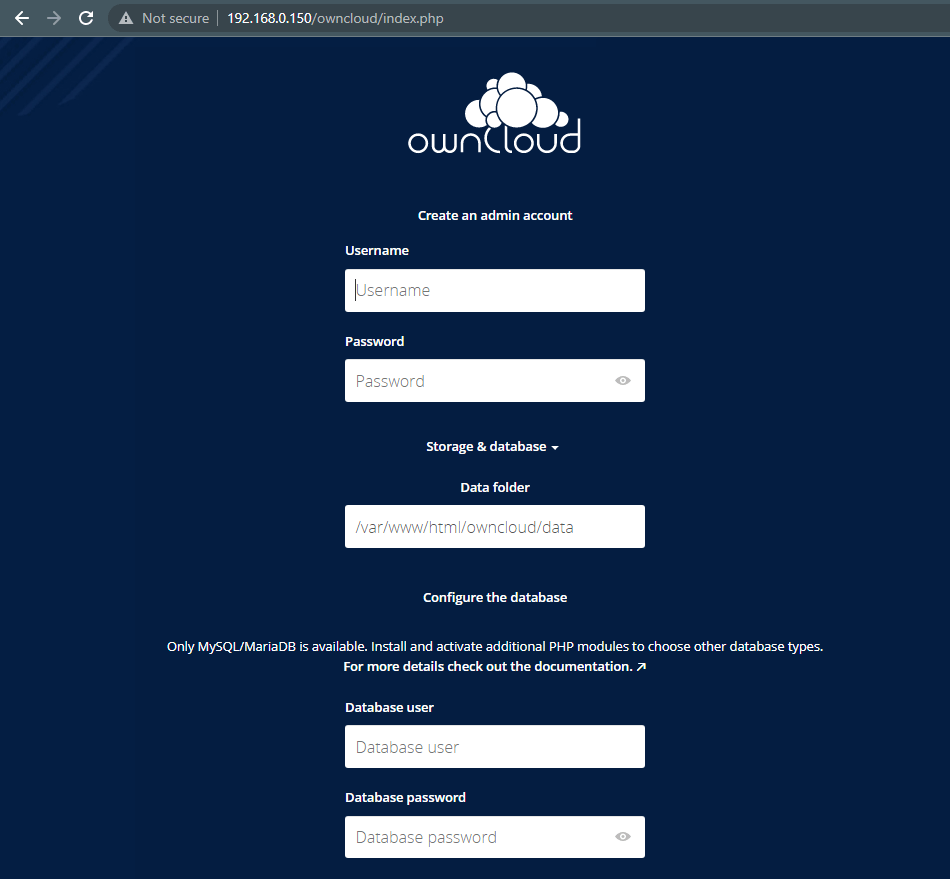
You need to fetch your password file to complete this setup. You can set the values you created.
- Username - type any username to login as admin.
- New password: - Any new password for login user
- Data Folder: /var/www/html/owncloud/data
- Database user: - owncloud
- Database password - qwertyness@@ (View Here)
- Database name - owncloud
- Database host - localhost
Press Finish Setup.
Owncloud will create the database content, settings, and more. Please wait until you see the login screen appear.
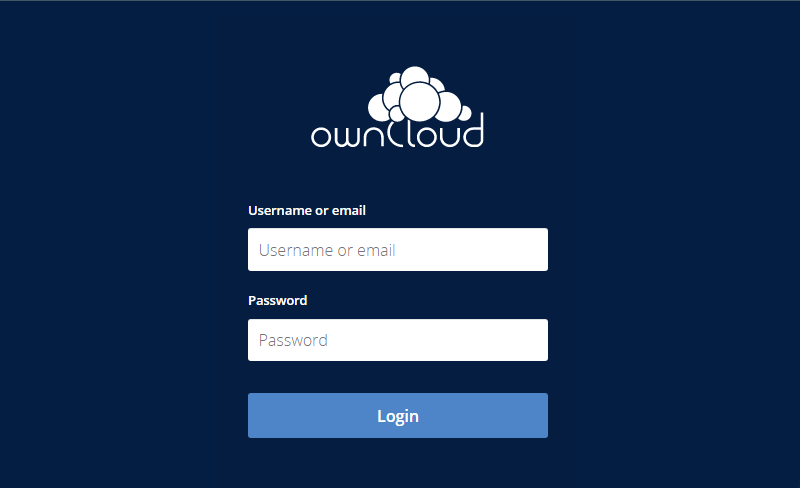
Awesome, if you see this screen you have a working automated backup server. We will set up the Owncloud users, folders, and security.
Grab a cup of coffee before we finish off the final part.
Need Support With Linux?
Let us help you set up any linux server, application. Book your linux session on our Online Shop
9) Create Owncloud Users.
We can create unlimited users on the Owncloud Server.
Each user will have their log-in details, folder sync profiles, and storage. You can set each user's storage limits, share limits, and permissions. There are two ways a user can access their files.
- Online through browser
- Sync application 100% Free.
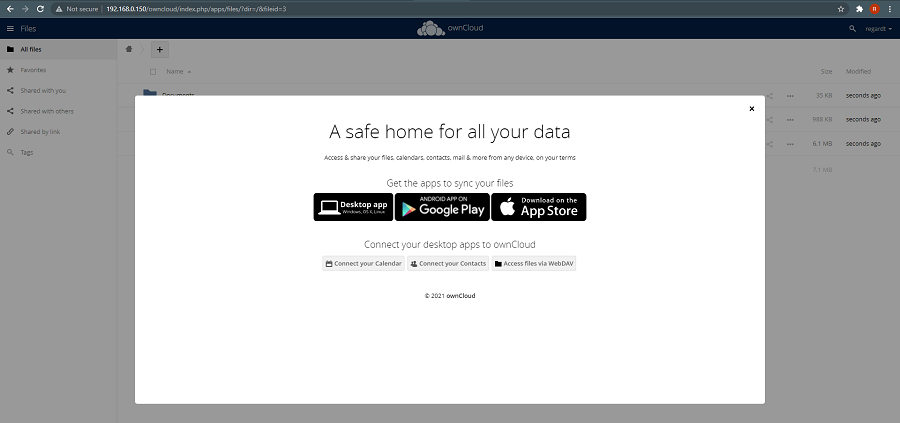
After you have signed in, you will get a welcome screen and you can download the Desktop Application.
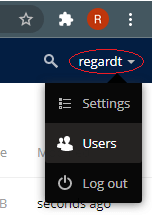
On the top right corner, you will see your name. Click on your name and select "Users"
Before you add any users, click on the small cogs in the bottom left corner. Check the tickbox "set password for new user"
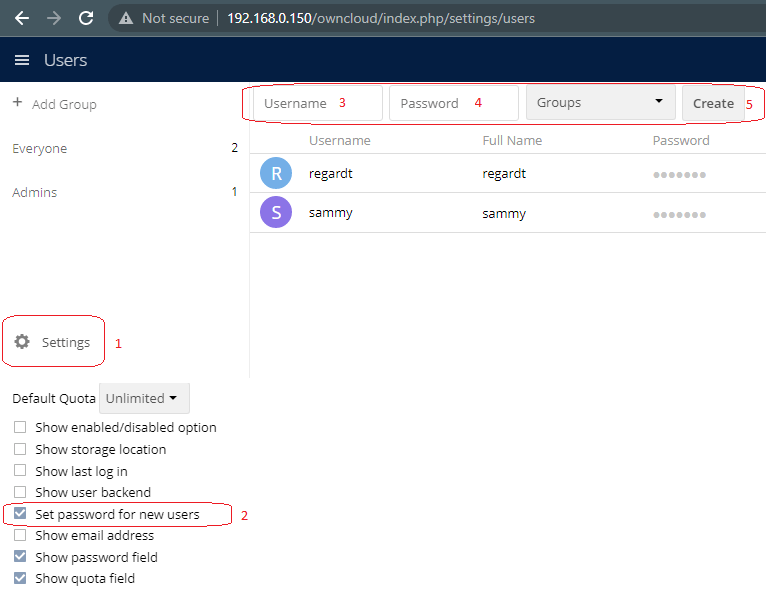
Add your users to the server. You must set the password for the user.
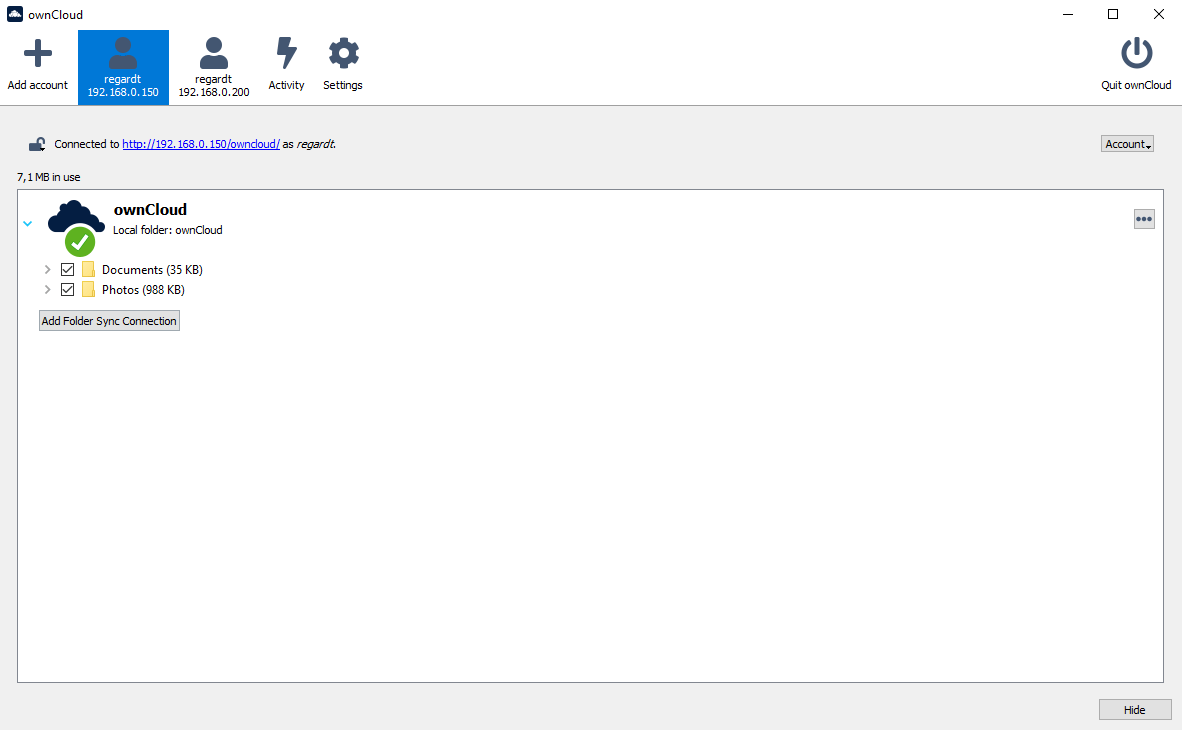
With the users created, you can now install the desktop application that will sync all your files to the server.
Download the desktop client here
Install the client.
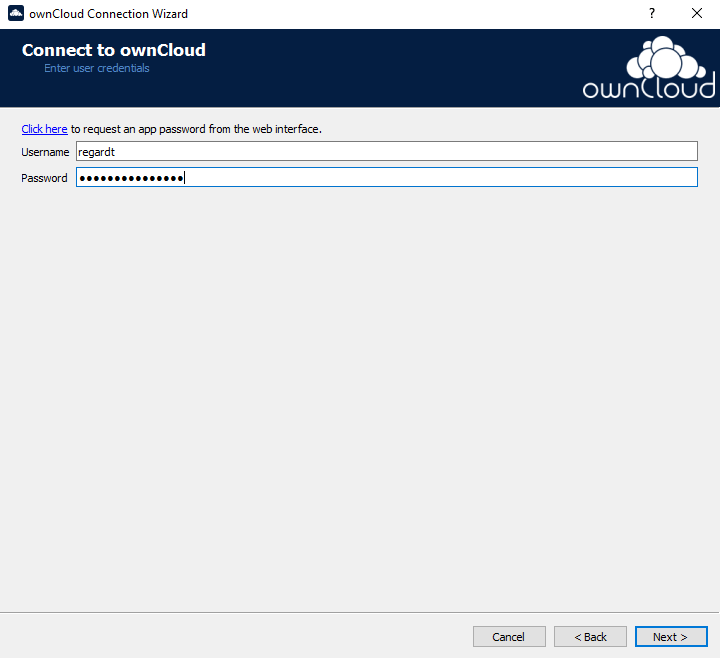
You need to enter the server ip address and click next.
http://192.168.0.150/owncloud

Enter username and password
Select folder sync options.

We have installed the Owncloud client. We can now save our folders under the Owncloud icons. The files will sync to the server automatically on save.
You can set up file and folder sharing, permissions, and more under the web portal. The main user can create groups, policies, and more.
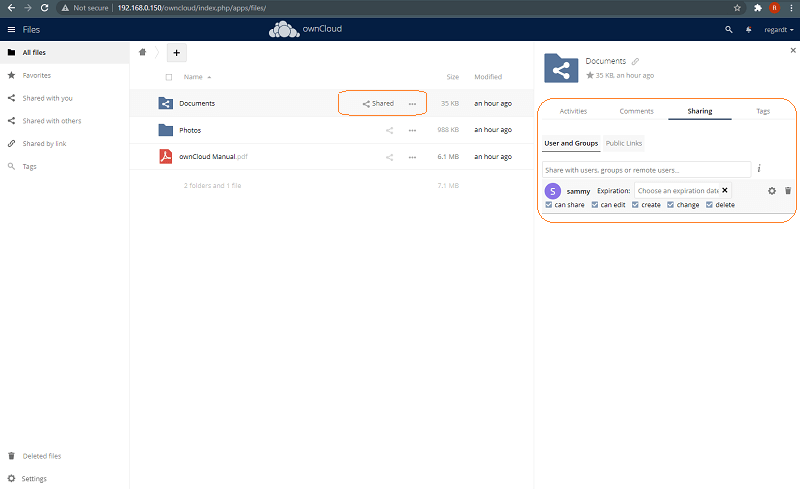
We are not going in-depth on the Owncloud functions or flow. You can watch videos on youtube to see all the features Owncloud offers.
Final Notes:
With major privacy concerns, many businesses are looking at alternative backup solutions. There is a huge pool of options available. Complete end-to-end backup solutions for your business. Get your backups into shape.
Published by Regardt Myburgh 11 October 2021
We hope this article was helpful.
We accept bitcoin donations.